Imagine sipping on a decadent milkshake so thick and luscious it feels like spooning up a cloud of blissful sweetness. With just a few simple tips and tricks, you can transform ordinary milkshakes into luxurious concoctions that rival those from your favorite ice cream parlor. From adding secret ingredients to blending techniques, we’ll unveil the secrets to achieving the perfect thickness every time. So grab your blender and get ready to embark on an exciting journey to milkshake perfection!
Milkshakes are a classic treat that can be enjoyed all year round. When it comes to making the perfect milkshake, the thickness is essential. A thick, creamy milkshake is the ultimate indulgence, while a thin, watery one can be disappointing. In this comprehensive guide, we will explore various ways to thicken milkshakes in a blender, the best blender for milkshakes and smoothies, and tips for creating the perfect consistency every time.
- You Can Choose: 10 Best Blenders for Milkshakes and Smoothies
How to Thicken Milkshake in Blender: The Ultimate Guide
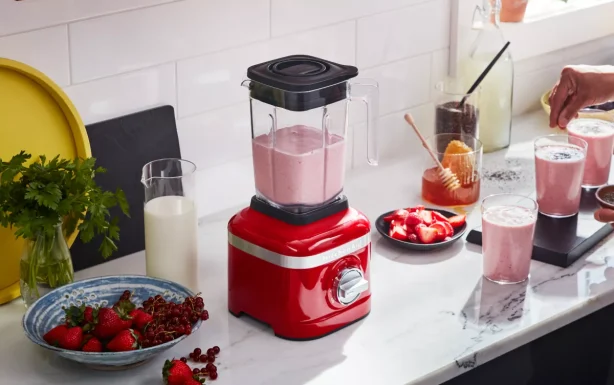
1. Choosing the Best Blender for Milkshakes and Smoothies
A high-quality blender is crucial for making the perfect milkshake. The best blender for milkshakes and smoothies will have powerful blades, various speed settings, and a large capacity. Here are some factors to consider when choosing the right blender:
| Factor | Description |
|---|---|
| Power | Look for at least 500 watts of power to ensure smooth blending of ice cream and ingredients. |
| Speed Settings | Multiple speed settings allow better control over the blending process for different thicknesses. |
| Capacity | A blender with a 40-ounce capacity or larger is ideal for making milkshakes. |
| Blades | High-quality stainless steel blades are recommended for easy crushing of ice and ingredients. |
| Easy to Clean | Choose a blender with removable parts or a self-cleaning feature for convenient cleanup. |
2. Using Whole Fat Ingredients for a Creamy Milkshake
The secret to a creamy and thick milkshake is using whole-fat ingredients. Full-fat ice cream and whole milk provide the rich, indulgent texture that makes a milkshake irresistible. Avoid using low-fat or skim milk, as these will result in a watery and less satisfying milkshake.
3. The Perfect Ice Cream to Milk Ratio
The ratio of ice cream to milk is crucial for achieving the desired milkshake thickness. Generally, a ratio of 2 cups of ice cream to 1/2 cup of milk will yield a thick and creamy milkshake. Adjust this ratio according to your preferences and the specific ingredients you are using.
4. Thicken Milkshakes with Additional Ingredients
If your milkshake is still too thin, consider adding some of the following ingredients to achieve the desired consistency:
| Additional Ingredients | Description |
|---|---|
| Crushed Ice | Adding crushed ice to your milkshake will immediately thicken the consistency. Be mindful of the amount of ice you add, as too much can dilute the flavor. |
| Whipping Cream | Whipping cream is high in fat and can add thickness to your milkshake. Add a tablespoon at a time and blend until the desired consistency is reached. |
| Full-Fat Yogurt | Whole-fat yogurt can add creaminess and thickness to your milkshake without altering the flavor too much. Start with a tablespoon and blend until the desired thickness is achieved. |
| Chocolate Syrup | Chocolate syrup or other flavored syrups can add both flavor and thickness to your milkshake. Add syrup to taste and blend well. |
| Fruits | Adding fruits like bananas, strawberries, or mangoes can thicken your milkshake and add a burst of flavor. Blend your chosen fruit with the milkshake until smooth. |
5. Blending Techniques for a Thick Milkshake
Proper blending techniques are essential for creating a thick and creamy milkshake. Follow these tips to ensure the perfect consistency:
| Blending Techniques | Description |
|---|---|
| Blend at High Speed | Blending at a high speed will help break down the ice cream and incorporate air, creating a thicker and creamier milkshake. |
| Pulse Blend | Using the pulse setting on your blender can help break down larger chunks of ice cream and ensure a smooth, even texture. |
| Blend in Stages | Blend your milkshake in stages, starting with the ice cream and gradually adding the milk. This will help ensure a smooth and consistent texture. |
6. How to Make a Milkshake without a Blender
If you don’t have a blender, you can still make a thick and creamy milkshake using one of the following methods:
| Method | Description |
|---|---|
| Bowl Method | Place softened ice cream and milk in a bowl and use a whisk or a fork to blend the ingredients until smooth. |
| Jar Method | Combine softened ice cream and milk in a jar with a lid. Use a spoon to mash the ingredients together, then secure the lid and shake vigorously to combine. |
| Food Processor or Immersion Blender | If you have a food processor or immersion blender, these tools can also be used to make a milkshake. |
7. Garnishing and Serving Your Perfect Milkshake
Once you’ve achieved the perfect consistency, it’s time to garnish and serve your milkshake. Top your milkshake with whipped cream, a cherry, or any other desired toppings. Serve in a tall glass with a wide straw or a spoon for the ultimate milkshake experience.
Blending techniques for a creamier texture
Blending techniques can make all the difference when it comes to achieving a creamy texture in your milkshakes. One effective method is to start with small ice cubes or crushed ice, which allows for easier blending and results in a smoother consistency. Another trick is to blend the ingredients at a lower speed initially, gradually increasing the speed as the mixture starts to come together. This gentle approach prevents over-mixing, which can lead to a thin or watery texture in your milkshake.
Furthermore, incorporating ingredients like frozen bananas or avocados into your milkshake can add natural creaminess without relying solely on heavy creams or syrups. These ingredients not only contribute to a luscious texture but also bring additional nutrients and flavors to the table. By experimenting with different blending techniques and innovative ingredients, you can elevate your milkshake game while achieving that irresistible creamy goodness that keeps you coming back for more.
Adding thickeners and flavorings
Adding thickeners and flavorings can elevate your milkshake game to the next level, transforming a simple treat into a decadent indulgence. One popular thickening agent is xanthan gum, which not only thickens the shake but also adds a smooth and creamy texture. This versatile ingredient allows you to adjust the thickness of your milkshake to suit your preferences, whether you prefer it thin enough to sip through a straw or thick enough to eat with a spoon.
When it comes to flavorings, the possibilities are endless. From classic options like vanilla extract and cocoa powder to more adventurous choices like peanut butter or fruit purees, adding flavorings can completely transform the taste of your milkshake. Experimenting with different combinations allows you to create unique and customized milkshakes that cater specifically to your taste buds. By carefully balancing the use of thickeners and flavorings, you can achieve the perfect consistency and an explosion of flavors in every sip of your homemade milkshake.
Tips for achieving the perfect consistency
Consistency is the key to achieving the perfect milkshake, and there are several tips to help you get it just right. To start, make sure your ingredients are properly chilled before blending. This can prevent the milkshake from becoming too runny and helps maintain a smooth, thick consistency. Additionally, consider using high-quality ice cream with a higher fat content for a richer texture and better thickening ability.
Another tip is to use minimal liquid when blending your milkshake in the blender. Adding too much milk or other liquids can result in a thin consistency that lacks the creamy texture desired in a perfect milkshake. Finally, try adding ingredients like frozen fruit or powdered dry milk to enhance thickness without diluting flavor, giving your milkshake that ideal balance of richness and creaminess.
Frequently Asked Questions about Thickening Milkshakes
In this section, we will address some of the most common questions surrounding milkshake thickness and how to achieve the perfect consistency.
How long should I blend my milkshake to thicken it?
The blending time will depend on the specific blender you are using, the ingredients, and your desired consistency. Generally, blending for 1-2 minutes at high speed should yield a thick and creamy milkshake.
Can I use powdered milk or non-dairy milk to thicken my milkshake?
While powdered milk and non-dairy milks can be used in milkshakes, they may not provide the same thickness and creaminess as whole milk. Experiment with different ratios and additional thickening ingredients to achieve your desired consistency.
How can I make a thick milkshake without ice cream?
If you’re looking for a dairy-free or lower-fat alternative to a traditional milkshake, consider using frozen bananas, avocado, or coconut cream as a base. These ingredients can provide a creamy and thick consistency without the need for ice cream.
Conclusion
In conclusion, making a thick and creamy milkshake in a blender is easy with the right ingredients, blending techniques, and equipment. Invest in the best blender for milkshakes and smoothies, use whole-fat ingredients, and experiment with additional thickening agents to create the perfect milkshake every time. Happy blending!
Ultimately, the key is finding the perfect balance between flavor, texture, and consistency. By embracing this experimentation and embracing trial-and-error as part of the process, you can elevate your milkshake-making skills and impress friends and family with irresistible creations. So don’t be afraid to get adventurous in search of that perfect thickness – who knows what delightful concoctions you might discover along the way!
